How We Build Your Pool: From Consultation to First Swim
Every Sapphire Pools project follows a proven process we've refined over 35+ years of building vinyl-lined inground pools in Central Massachusetts. This page explains exactly what happens at each stage — so you know what to expect, when to expect it, and how we handle the challenges that New England's climate and terrain present.


Phase 1: Consultation & Site Assessment
Every project starts with a free, no-pressure site visit. We come to your property to:
- Discuss your vision — How will you use the pool? Who will use it? What features matter most?
- Assess the site — We check setbacks from property lines, identify potential soil issues, locate utilities, evaluate access for equipment, and check for wetland proximity.
- Identify challenges early — Ledge rock, high water table, tight access, septic proximity, or Conservation Commission jurisdiction. Better to know now than during excavation.
- Discuss budget — We're honest about what things cost. We'd rather design a pool that fits your budget than surprise you later.
"In our experience, the consultation is the most important step. It's where we identify 90% of the potential issues that could affect your project. A thorough site assessment prevents expensive surprises during construction." — The Sapphire Pools Team
Schedule your free consultation or call us at (508) 692-6092.
Phase 2: Design & Proposal
Based on the site assessment and your preferences, we develop a detailed proposal including:
🔧 Lesson From the Field:
On a project in Charlton, we discovered a buried septic line during excavation that wasn't on any survey. Because we always hand-dig the first 18 inches and use ground-penetrating radar on older properties, we caught it before any damage occurred. This added half a day to the project but saved the homeowner thousands in potential repairs. It's one reason we never rush the excavation phase — what's underground matters as much as what's above it.
- Pool shape, dimensions, and depth configuration
- Wall panel type (steel or polymer) and liner options
- Equipment package (pump, filter, heater, sanitization)
- Decking/patio material and layout
- Fencing plan (code-compliant, 780 CMR)
- Complete project pricing — no hidden costs
With vinyl liner construction, you're not limited to pre-made shapes. We can design any configuration that fits your property — rectangles, L-shapes, kidney, freeform, or custom geometric designs. Browse our project gallery for inspiration.
Phase 3: Permits & Approvals
We handle the entire permitting process — you don't need to visit town hall or fill out applications. This includes:
| Permit/Approval | Timeline | When Required |
|---|---|---|
| Building permit | 1-3 weeks | Always (required by 780 CMR) |
| Electrical permit | 1-2 weeks | Always (separate from building permit) |
| Conservation Commission (NOI) | 4-8 weeks | If within 100 ft of wetland resource area |
| ZBA variance | 6-10 weeks | If pool can't meet setback requirements |
| Board of Health | 1-3 weeks | Some towns (e.g., Sturbridge) require separate pool permit |
For a complete breakdown of the permitting process, read our Massachusetts Pool Permits Guide.
Phase 4: Excavation
Once permits are approved and materials are ordered, construction begins with excavation. This is the most dramatic day of the project — your backyard transforms in hours.
- Dig Safe notification — We call 811 at least 72 hours before digging to mark all underground utilities.
- Equipment access — Our excavator needs an 8-10 foot wide path to reach the pool location.
- Soil handling — Excavated soil is either hauled away or used for grading elsewhere on your property (your choice).
- Depth and shape — We excavate to the exact dimensions and depth profile of your pool design, accounting for the wall panel thickness and floor material.
"A project we completed in Charlton hit ledge rock at 3 feet — shallower than expected. Because we'd identified the possibility during the site assessment and discussed it with the homeowner upfront, we had a plan ready. The hydraulic hammer added a day to the excavation, but the project stayed on track because we were prepared." — The Sapphire Pools Team
Phase 5: Structure & Plumbing
After excavation, the pool takes shape:
- Concrete footings poured — The base that supports the wall panels. Must be level and properly cured.
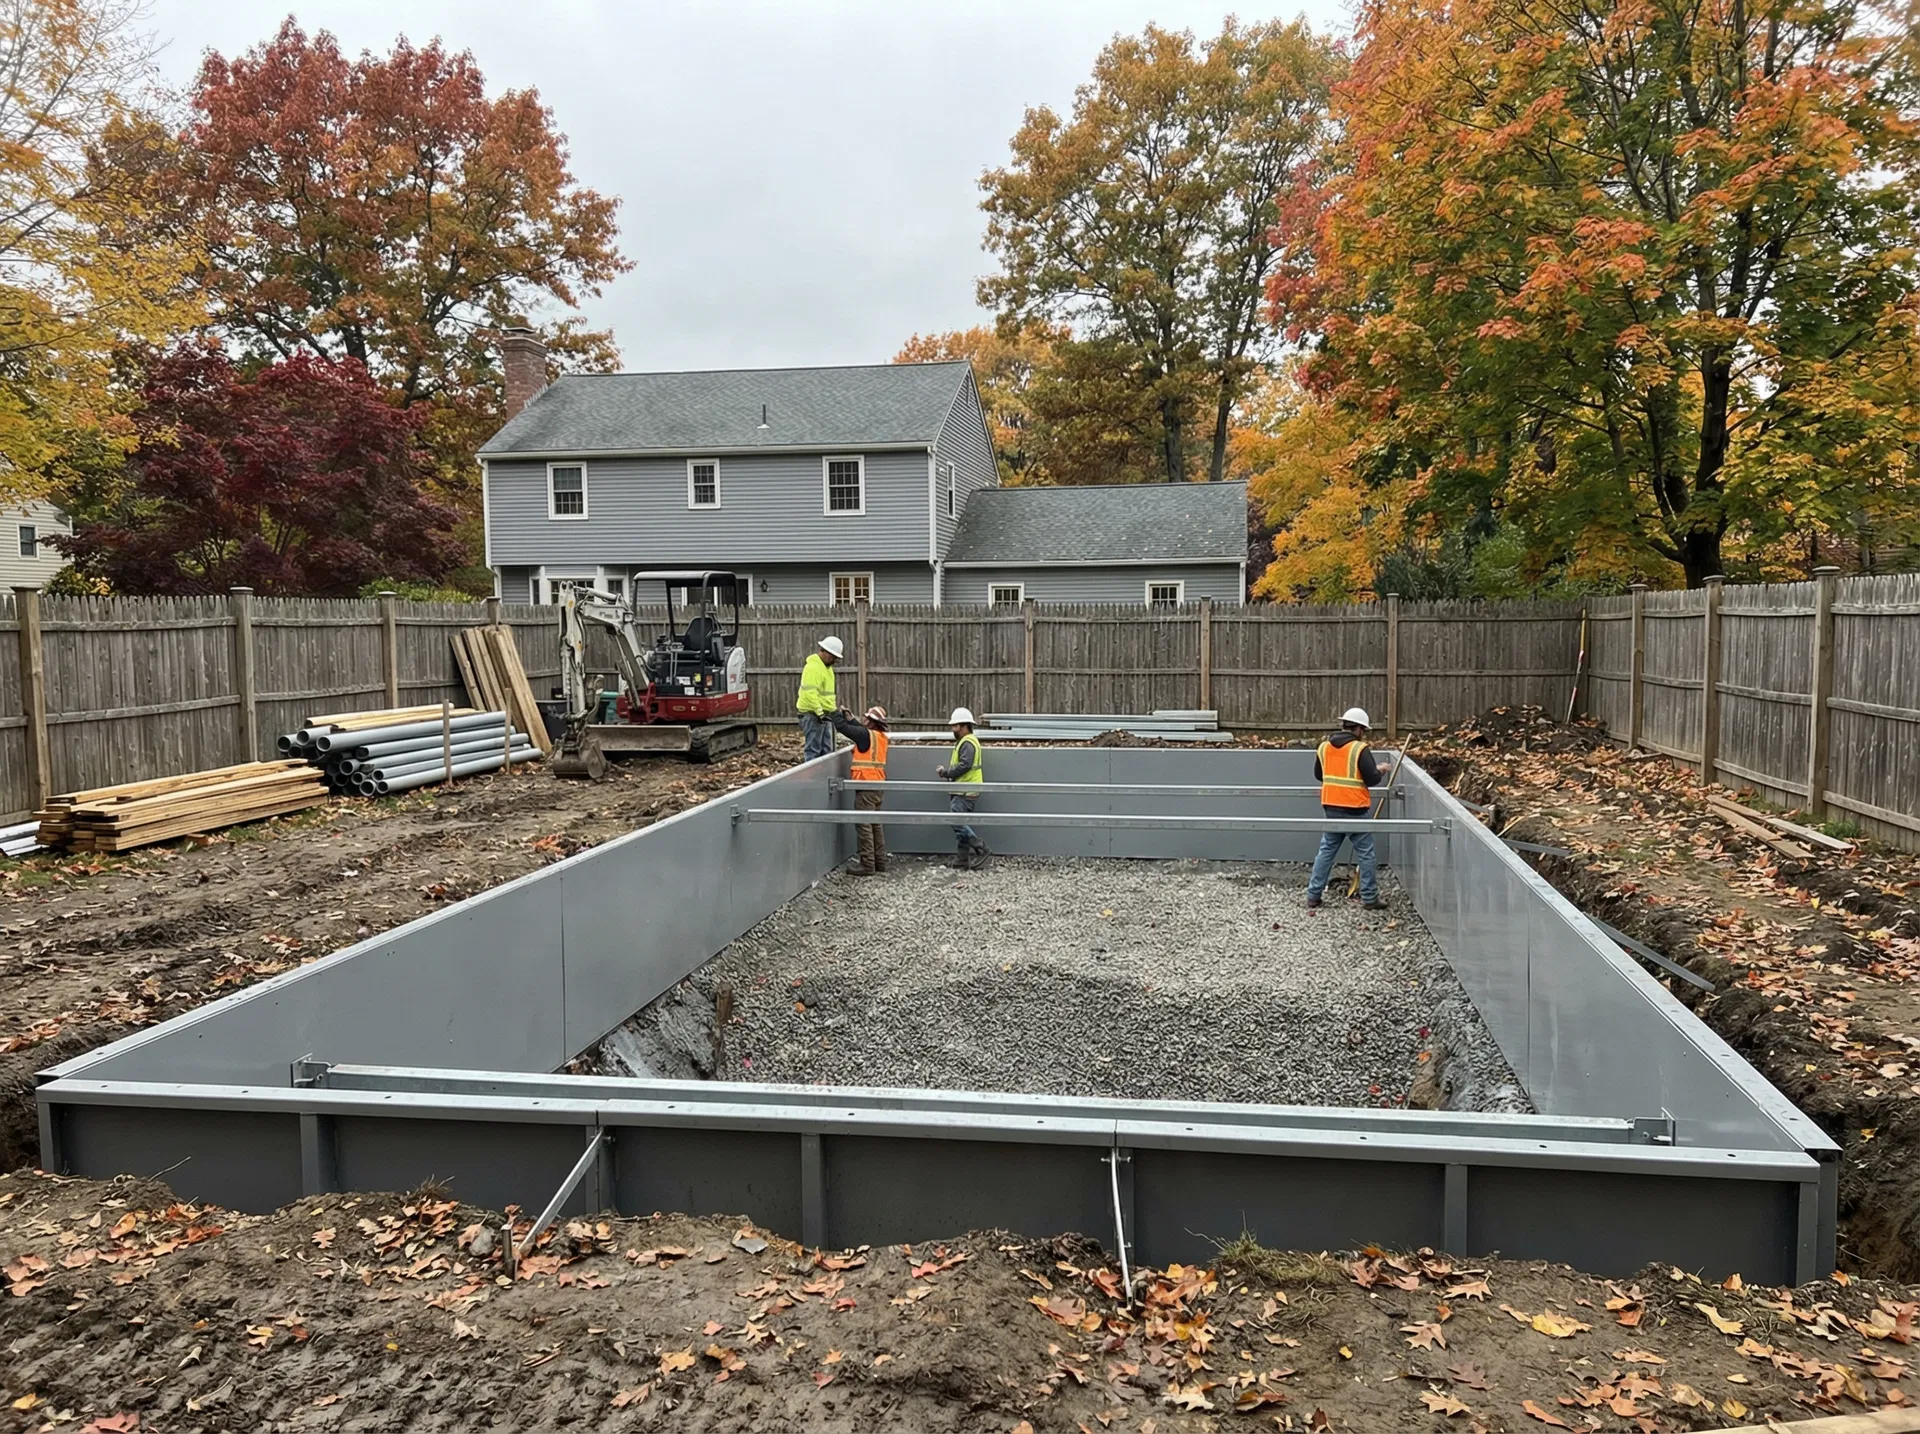
- Wall panels set — Galvanized steel or polymer panels bolted to the footings and braced. This defines the pool's shape.
- Plumbing installed — Skimmer(s), return jets, main drain, and all underground piping run to the equipment pad location.
- Floor poured — Vermiculite/cement mixture or concrete floor creates the smooth base for the liner.
- Steps and features formed — Entry steps, bench seating, tanning ledges, or other features are built into the structure.
Phase 6: Liner Installation
The liner is the defining feature of a vinyl liner pool — and proper installation is critical to its longevity and appearance.
- Custom-manufactured — Your liner is made to the exact dimensions of your pool. Manufacturing takes 2-3 weeks after the order is placed.
- Temperature matters — We install liners when ambient temperature is above 50°F. Warmer vinyl stretches properly and conforms to the pool's contours without wrinkles.
- Vacuum fitting — We use a specialized vacuum system to pull the liner tight against the walls and floor before filling begins. This eliminates wrinkles and ensures a smooth finish.
- Filling begins immediately — Once the liner is positioned and the vacuum is holding, we begin filling the pool with water. The weight of the water locks the liner in place.
Learn more about liner options in our vinyl liner replacement page.
Phase 7: Equipment & Electrical
While the pool fills (15,000-25,000+ gallons takes 1-2 days), we install the equipment:
- Equipment pad — Concrete pad for pump, filter, heater, and controls
- Pump and filter — Variable-speed pump (energy-efficient) and appropriately sized filter
- Heater — Gas heater or heat pump, depending on your preference and budget
- Sanitization — Salt chlorine generator or traditional chlorine system
- Electrical connections — Licensed electrician handles all wiring, bonding, GFCI protection, and disconnect per NEC Article 680
- Lighting — LED pool lights installed and connected
See our equipment upgrades page for details on available options.
Phase 8: Backfill, Deck & Fence
The final construction phase completes the pool area:
- Backfill — The space between the pool walls and the excavation is filled with clean material (stone dust or gravel) and compacted in lifts.
- Decking/patio — Concrete, pavers, or natural stone installed around the pool. See our patio and deck services.
- Fencing — Code-compliant pool barrier installed per 780 CMR (48" height, self-closing/self-latching gates, no climbable features). See our fencing service.
- Grading — Surrounding area graded to direct water away from the pool and restore proper drainage.
Phase 9: Inspections & Startup
Before you swim, the project must pass all required inspections:
- Building inspection — Verifies pool construction, setbacks, and overall compliance
- Electrical inspection — Confirms NEC 680 compliance (bonding, GFCI, clearances)
- Fence inspection — Checks barrier height, gate operation, and gap compliance
- Final inspection — Overall sign-off from the building inspector
Once inspections pass, we:
- Balance the water chemistry (pH, alkalinity, chlorine/salt)
- Program the equipment (pump schedules, heater settings)
- Walk you through pool operation and basic care
- Provide all warranty documentation and care instructions
Then you swim.
Frequently Asked Questions
How long does pool construction take from start to finish?
Active construction typically takes 2-4 weeks from excavation to swimming. The total project timeline (including consultation, design, permits, and material ordering) is usually 8-16 weeks. Starting in January-February gives you the best chance of swimming by early summer.
Will my yard be destroyed during construction?
Pool construction is disruptive — heavy equipment needs access, soil is excavated, and the area around the pool will be bare until landscaping is complete. We minimize impact by planning equipment paths carefully and grading the site after construction. Most homeowners complete landscaping restoration within a few weeks of pool completion.
What happens if you hit rock during excavation?
Ledge rock is common in Central Massachusetts. If we encounter it, we use hydraulic hammers to break through it. This adds time and cost to the project. We assess the likelihood of hitting rock during the site visit and discuss it with you upfront — if rock is likely, we include a contingency in the proposal so you're prepared.
Do I need to be home during construction?
No. We need access to your property and electrical panel, and we'll coordinate with you on key decisions. We keep you updated throughout and schedule a walkthrough before the final inspection. Most homeowners check in periodically but don't need to be present for the day-to-day work.
What warranty do I get?
Warranty coverage includes the liner manufacturer's warranty (typically 20-25 years prorated), equipment manufacturer warranties (varies by component), and our workmanship warranty on the installation. We provide all warranty documentation at project completion and explain what's covered and for how long.
Can I add features later?
Some features can be added later (heaters, salt systems, automation, lighting upgrades), but structural features (tanning ledges, bench seating, spa) are much easier and less expensive to include during initial construction. We always recommend planning for features you might want in the future — even if you don't install them immediately, we can rough in the plumbing and electrical for later.